Best Framing Square For Carpentry (2026)
About the author
The one-line mistake that throws off a whole build
You mark a rafter cut, snap a line, and everything looks fine—until the pieces stack up. Then the wall is out, the stair stringers don’t match, or your sheathing edge lands “almost” on the stud. In carpentry, tiny layout errors don’t stay tiny.
The best framing square for carpentry isn’t about fancy features. It’s about a square that stays true, reads fast, and survives jobsite handling so your layout stays consistent from the first mark to the last cut.
Best framing square for carpentry: quick picks (what this page covers)
Disclosure: As an Amazon Associate, ToolLayout may earn from qualifying purchases. This doesn’t change what we recommend.
This page compares 5 proven framing squares for 2026, focused on real carpentry use:
- Fast, readable layout for studs, plates, sheathing, and trim backing
- Rafter/stair layout using common tables and a consistent reference edge
- Durability + accuracy that holds up in a tool belt, truck, or gang box
If you want the basics first, start at Squares hub
Best Framing Square for Carpentry (2026): Top 5 Picks
| Image | Product | Best for | Key feature | View on Amazon |
|---|---|---|---|---|
 | Swanson Tool Co. TS149 Speed Square Pro Framing Square (16″ x 24″) | All-around carpentry layout when you want clear markings and a reliable, jobsite-friendly square | Heavy-gauge steel with easy-to-read stamped tables and a classic 16″ x 24″ layout | View on Amazon |
 | Johnson Level & Tool CS10 Framing Square (16″ x 24″) | Repeatable rafter/stair work when you want bold, high-contrast numbers that read fast | High-visibility, easy-read graduations and tables for quick layout checks | View on Amazon |
 | Empire E250 Framing Square (16″ x 24″) | Budget-first carpentry and occasional use (still a big upgrade over a bent or mystery square) | Solid, straightforward 16″ x 24″ square with clear layout markings | View on Amazon |
 | Starrett 20-624 Steel Framing Square (16″ x 24″) | Precision-focused layout and shop-to-jobsite carpentry where you want a premium, “keep it for years” square | High-quality steel with crisp, accurate graduations and excellent edge feel | View on Amazon |
| Swanson Tool Co. T0701 16″ x 24″ Framing Square | Framing square for carpentry for beginners (simple, familiar, and easy to learn on) | Classic layout tables and a no-nonsense steel build that’s easy to handle | View on Amazon |
1) Swanson Tool Co. TS149 Speed Square Pro Framing Square (16″ x 24″) — Best overall for carpentry layout (most DIY + jobsite use)
A classic 16″ x 24″ framing square that reads quickly and holds up to regular carpentry layout.
Watch for: store it flat—most “out of square” issues come from bends, drops, and twisted storage
Best for: everyday framing layout, checking corners, and rafter/stair marking
What you’ll like: clear stamped tables and a familiar layout that’s fast to learn
🧐 Quick verdict: A dependable, do-most-things framing square for carpentry layout, with a great balance of readability and durability.
| Pros ✅ | Cons ⚠️ |
|---|---|
| ✅ Solid steel build with a familiar 16″ x 24″ format | ⚠️ Like any steel square, accuracy depends on keeping it from getting bent |
| ✅ Markings/tables are easy to reference for common carpentry layout | |
| ✅ Good “first real framing square” for DIYers and homeowners |
Why it’s a top pick: In most carpentry, you need a square that’s quick to read, easy to register on an edge, and consistent across repeated marks. This style hits the sweet spot, so you’ll actually use it instead of “eyeballing” the next step.
Decision bullets
- Best use: Framing layout, checking corners on sheet goods, and quick reference for rafter/stair marks.
- Readability: Look for bold graduations you can see in mixed light (garage, jobsite shade, indoors).
- Accuracy reality: Any framing square can be accurate—until it’s bent. Treat it like a measuring tool, not a pry bar.
- Handling tip: Store it flat (or hang it). Don’t toss it under lumber where it can get tweaked.
- Best for: General framing square for carpentry work where speed + consistency matter.
Shop tip: If you’re tuning joinery and small parts, a try square is the better tool at that scale. See: best try square for woodworking
2) Johnson Level & Tool CS10 Framing Square (16″ x 24″) — Best for repeatable rafter/stair layout + fast reading
A strong choice for repeat layout because the markings are easy to see and quick to verify.
Watch for: verify your reference edge, then keep the same “face” of the square against the work for the whole batch
Best for: rafter and stair stringer layout, plus fast checks on framing corners
What you’ll like: high-contrast, easy-read graduations that reduce misreads
🧐 Quick verdict: Great when you want a framing square for carpentry that’s quick to read, so you can repeat marks with less second-guessing.
| Pros ✅ | Cons ⚠️ |
|---|---|
| ✅ Easy-to-read markings help prevent layout mistakes | ⚠️ Still needs careful storage/handling to avoid bending |
| ✅ Good for batch layout (multiple rafters/stringers) | |
| ✅ Familiar 16″ x 24″ sizing for standard carpentry workflows |
If you’re doing repeat layout—rafters, stringers, or just a lot of studs—readability is a real feature. The faster you can confirm your marks, the fewer compound mistakes you build into the project.
Why it’s a top pick: It’s built around practical carpentry: quick reads, quick checks, and a layout you can repeat without second-guessing.
Decision bullets
- Best use: Repeated rafter/stair marking and general framing checks where misreading a line costs time.
- How to keep it consistent: Pick one reference edge/face and keep it the same for the entire batch.
- Durability note: Steel squares stay accurate when they stay flat—hang it or store it where it can’t get twisted.
- Layout habit: Knife/awl lines are great in the shop, but for framing lumber a sharp pencil + consistent pressure usually wins.
- Best for: Repeatable carpentry layout where speed and legibility reduce mistakes.
3) Empire E250 Framing Square (16″ x 24″) — Best budget-first choice (occasional use, still better than a questionable square)
A practical option when you need a basic 16″ x 24″ framing square for occasional carpentry projects.
Watch for: check it for square when it arrives, and re-check if it takes a fall
Best for: general DIY framing, shed projects, repairs, and layout checks
What you’ll like: simple, familiar markings—no learning curve
🧐 Quick verdict: A solid budget framing square for carpentry when you want reliable layout without overbuying.
| Pros ✅ | Cons ⚠️ |
|---|---|
| ✅ Good entry point for occasional carpentry layout | ⚠️ Not the toughest option if it lives in a crowded truck box |
| ✅ Simple to use and easy to replace if it gets abused | |
| ✅ Better than relying on “looks square” eyeballing |
If you’re building a shed, framing a wall, or doing repairs, you don’t need a collector’s tool. You need a square you can trust more than your wrist. A budget framing square can absolutely do the job, but only if you keep it from getting bent.
Why it’s a top pick: It’s a simple way to stop guessing. Straight layout lines improve everything downstream, from cuts to fit-up to how “square” the finished work feels.
Decision bullets
- Best use: DIY framing and general carpentry where you need a true 90° reference and quick measurements.
- Accuracy habit: Do a quick squareness check on a straight board (mark, flip, remark). If lines diverge, adjust your technique or replace.
- Handling: Don’t use it as a straightedge for prying or scraping—thin steel can take a set.
- Marking: Use a sharp pencil; a fat carpenter pencil can hide a small error fast.
- Best for: Occasional carpentry projects where you want a straightforward, reliable square.
4) Starrett 20-624 Steel Framing Square (16″ x 24″) — Best for precision-focused layout + long-term durability

A premium steel square for when you want crisp graduations and a “true tool” feel in the hand.
Watch for: don’t let other tools ride on top of it in a box—protect the edges so it stays flat
Best for: precision layout, checking assemblies, and carpentry where accuracy carries through to visible finish work
What you’ll like: excellent graduation quality and clean edges for accurate scribing/marking
🧐 Quick verdict: Best when you want a framing square that feels precise and stays in your kit for the long haul.
| Pros ✅ | Cons ⚠️ |
|---|---|
| ✅ Crisp, high-quality graduations for careful layout | ⚠️ Overkill if you regularly abuse squares on rough jobs |
| ✅ Excellent edge feel for accurate marking | |
| ✅ Great “reference” square to verify other squares/tools |
When your framing square is also your “truth tool” for checking assemblies, you want something that reads cleanly and registers confidently on the edge. A premium square is also handy when rough carpentry runs into visible finish work (built-ins, stair parts, exposed framing details).
Why it’s a top pick: This is the kind of square you can use as a reference to check other squares and keep your layout honest over time.
Decision bullets
- Best use: Precision layout and verification (checking other tools, checking assemblies, careful marking).
- Marking style: Great for fine pencil lines and scribing because the edges feel more “defined.”
- Storage: Hang it or keep it in a sleeve/slot so it can’t get twisted in transport.
- Workflow: If you do both rough framing and finish carpentry, keep this as your “clean square” and use a cheaper square for abuse.
- Best for: Carpenters and serious DIYers who want a premium framing square that stays trustworthy.
Technique refresher: how to choose a framing square for carpentry
5) Swanson Tool Co. T0701 16″ x 24″ Framing Square — Best simple pick for beginners (learn layout without fighting the tool)
A straightforward framing square that’s easy to learn on and easy to keep in your kit.
Watch for: keep your pencil sharp—beginner errors are usually marking errors, not the square
Best for: learning framing layout, checking corners, and everyday measuring/marking
What you’ll like: familiar tables and a simple, no-drama tool you’ll actually grab
🧐 Quick verdict: Best framing square for carpentry for beginners: simple, familiar, and effective while your layout habits are still developing.
| Pros ✅ | Cons ⚠️ |
|---|---|
| ✅ Easy to learn and use for basic carpentry layout | ⚠️ Not as “premium feeling” as higher-end reference squares |
| ✅ Classic 16″ x 24″ sizing works for most framing tasks | ⚠️ Needs decent storage to stay flat and true |
| ✅ Great as a dedicated jobsite square you won’t baby |
If you’re learning carpentry layout, you want a square that feels simple and predictable. Most beginner frustration comes from poor registration (the square shifting), fat pencil lines, and flipping reference faces mid-layout. A basic, consistent square helps you build good habits faster.
Why it’s a top pick: It’s a clean entry point. You can learn how to mark, verify, and repeat without paying for features you won’t use yet.
Decision bullets
- Best use: First framing square for carpentry, DIY framing, and general layout checks.
- Beginner workflow: Mark from one face, keep the square tight to the edge, and pull the same direction each time.
- Verification: Do a quick “flip test” on a straight board whenever something looks off.
- Support tools: A sharp pencil and a decent tape measure do more for accuracy than upgrading the square too early.
- Best for: Learning framing layout and building repeatable marking habits.
Common mistakes to avoid: common framing square mistakes (and quick fixes)
How we choose
To recommend a framing square that actually helps in carpentry, we focus on what changes results on real material:
- Stays square (and stays that way with normal handling)
- Readability (fast to read in mixed light, less chance of misreading)
- Edge feel + registration (how well it sits on an edge without rocking)
- Useful tables/markings (rafter/stair references that match common carpentry workflows)
- Workholding reality (how it behaves on crowned lumber, rough edges, and sheet goods)
Don’t buy the wrong framing square
Don’t buy this if…
- You want a small precision tool for joinery and furniture parts. A framing square is big and fast, not delicate. For that, use a try square: best try square for woodworking
- You plan to treat it like a pry bar, scraper, or straightedge for demolition. Any steel square can get bent, and once it’s bent, your layout is lying to you.
- You expect the printed rafter/stair tables to replace understanding the layout. Tables help, but you still need consistent registration and marking.
Buy this if…
- You want faster, more consistent layout for framing, sheathing, stair stringers, and general carpentry work.
- You’re tired of “close enough” corners and want a reliable 90° reference you can trust.
- You want a framing square for carpentry for beginners that helps build good layout habits (tight registration, consistent reference face, sharp marks).
Framing square for carpentry buying guide: how to choose the right one
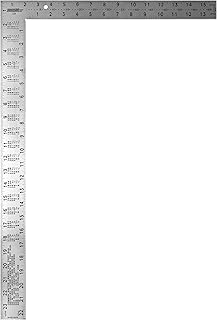
Start with the standard size: 16″ x 24″
For most carpentry, a 16″ x 24″ framing square is the standard because it registers well on sheet goods and framing lumber. It also matches common layout references, so your workflow stays simple.
If you only do small work, you might reach for a smaller square more often. But for framing layout, the full-size square is the workhorse.
Material: steel vs aluminum (jobsite reality)
Most traditional framing squares are steel. Steel is stiff and stable, but it can bend if it’s abused. Aluminum is lighter, but edges can get dinged and markings can wear depending on the finish.
Whichever material you choose, treat it like a reference tool. Keep it flat, keep it clean, and don’t store it where it can be twisted.
Readability: bold marks beat “more marks”
On a jobsite, readability beats complexity. Clear 1/8″ and 1/16″ marks (and numbers you can see without squinting) reduce mistakes more than extra tables you never use.
How to check if a framing square is actually square (fast test)
Quick accuracy test (1 minute)
- Pick a straight board edge (or a factory edge of plywood).
- Register the square tight, then draw a line along the tongue.
- Flip the square over (mirror it) and draw again from the same starting point.
- If the lines diverge, the square is off (or you’re not registering consistently). Re-test with firmer registration.
If you want a deeper walkthrough: how to choose a framing square for carpentry
Beginner technique: registration and reference face
Most “my square is wrong” moments are technique problems, not tool problems:
- Register tight: keep steady pressure so the square doesn’t creep while you mark.
- One reference face: keep the same face of the square against the work for a whole layout sequence.
- Sharp marks: a sharp pencil line is more accurate than trying to “split” a thick line later.
Common pitfalls and fixes: common mistakes framing square for carpentry
When a framing square isn’t the right square
If you’re fitting doors, tuning joinery, or doing furniture-style layout, a framing square is usually too big and clumsy. That’s where a try square shines: best try square for woodworking
Best framing square for carpentry: a simple 5-step checklist
If you’re stuck between two options, use this quick checklist so you buy the right square the first time:
- Choose 16″ x 24″ unless you have a specific reason not to.
- Prioritize bold, readable graduations you can see in mixed light.
- Check the edges for clean registration (no obvious dings or warps).
- Do the flip test on day one, and again after any drop.
- Plan how you’ll store it flat or hung, because storage keeps it accurate.
Troubleshooting table: problem → cause → fix
| Problem you see | Likely cause | Fix that works in a real shop |
|---|---|---|
| Your “square” layout drifts across a sheet | Square not registered tight; working from different reference edges | Pick one reference edge/face, keep pressure on the fence edge, and re-check every few marks |
| Stud marks don’t line up when you flip the board | Switching reference face; board edge isn’t straight | Mark everything from one face; if the edge is rough, snap a line from a known reference |
| Rafter/stringer parts don’t match even with the same numbers | Square shifted; inconsistent hook point/start point | Use a consistent start point, clamp a stop block for repeats, and verify the first piece before batching |
| Lines look “thick” and cuts wander | Dull pencil; marking too hard | Use a sharp pencil, lighter pressure, and mark on the waste side of the cut |
| Square was accurate, now it’s not | Tool got bent or twisted in storage/transport | Do the flip test; if it’s off, replace or re-true (and store it flat/hung) |
| Layout is square but assembly isn’t | Material crown/bow; clamping sequence | Crown studs consistently, clamp and fasten in a sequence that holds alignment, and verify diagonals |
For a deeper fix list (with examples): common mistakes framing square for carpentry (and quick fixes)
Common mistakes and quick wins (jobsite-pro tips)
Quick wins that instantly improve layout accuracy
- Use a sharp pencil (or a mechanical pencil) for layout you care about.
- Keep one reference face against the work for the whole sequence.
- Check your square fast with the flip test before a big batch of cuts.
- Use a stop block for repeat marks so you’re not “measuring the same thing” ten times.
Common mistakes
- Letting the square “float” instead of registering it tight to the edge.
- Using the square as a lever/pry tool and slowly bending it out of true.
- Marking from different edges/faces and wondering why parts don’t match.
If you want a clean technique walkthrough, see: how to choose a framing square for carpentry
FAQs
1) What’s the best framing square for carpentry?
For most DIY and jobsite tasks, the best choice is a standard 16″ x 24″ steel framing square with clear markings that you’ll keep flat and protected. That combination gives you fast, repeatable layout without overcomplicating the tool.
2) Is a framing square accurate enough for carpentry work?
Yes—if it’s actually square and you register it consistently. Most accuracy problems come from a bent square, a rough reference edge, or switching reference faces mid-layout.
3) How do I check if my framing square is out of square?
Do the flip test: mark a line, flip the square, and mark again from the same starting point. If the lines don’t match, the square is off (or you’re not registering consistently). Re-test with firm registration on a straight edge.
4) What size framing square should I buy for carpentry?
The standard is 16″ x 24″. It’s the most useful size for framing lumber and sheet goods because it registers well and matches common layout workflows.
5) What’s the best framing square for carpentry for beginners?
A simple 16″ x 24″ steel square with clear, readable markings is the best starting point. Beginners get the biggest gains from consistent registration, one reference face, and sharp pencil lines—not from extra features.
6) Can a framing square replace a try square?
Not really. A framing square is great for big layout, but it’s bulky for small joinery and fine fitting. For woodworking and tight trim work, use a try square: best try square for woodworking
7) Why do my cuts come out “not square” even when I used a framing square?
Common causes: the square shifted while marking, the board edge wasn’t straight, the pencil line was too thick, or the saw followed the wrong side of the line. Tight registration, a sharp pencil, and consistent reference faces fix most of it.
8) Do I need rafter/stair tables on my framing square?
They help if you actually use them. If you don’t do rafters or stairs, prioritize readability and durability over extra printed information.
9) What’s the best way to store a framing square so it stays accurate?
Store it flat or hang it. Avoid stacking heavy tools on top of it, and don’t wedge it where it can be twisted. Most framing squares go out of square from storage damage, not normal marking.
Conclusion: which framing square should you buy?
If you want the most useful “first” option, start with Pick #1: a classic, readable 16″ x 24″ steel square that covers everyday framing layout.
For fast, repeatable rafter/stair marking where readability matters, Pick #2 is a strong upgrade.
If you just need a basic square for occasional carpentry, Pick #3 gets you out of the guessing game.
If you want a premium reference square for careful layout (and to verify other tools), Pick #4 is the long-term play.
And if you’re learning, Pick #5 is a simple framing square for carpentry for beginners that helps build good habits.
For more square types and when to use each, head to: Squares hub